Symmetrical Double Sided Door System – Aluminium Quebec 35mm
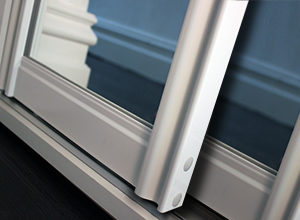
Quebec is one of our high-end aluminium systems. The framework is symmetrical, so looks the same from the front as it does from the back. Quebec makes a perfect single or double-sided door (for walk through applications or sliding room divider). Please note, the design tool only specifies & costs the front panels. For a true double-sided door you need to specify the reverse also. A great value option is mirror, but you need to contact us for a quote on this.
Door frame colours: available in natural anodised Silver, White, Champagne.
Please note: Letterbox 3 panel door style: the middle ‘letterbox’ panel will be made to a height of 350mm unless you specify otherwise.
Using our Good/Better/Best ranking, this product is up there with our BEST.
Door prices up to 1000mm wide and up to 2500mm high, including VAT and tracks:
- Perfect for double-sided doors – contact us for more information and a quote.
- Perfect for top-hung double-sided doors for walk-through applications
- Ask about our recessed floor tracks for wooden floors
- Pivot kit also available
- View our ‘Further Information‘ page to see how to measure and install, for technical specifications and other useful information.
White Powder Coated Doors and Mirror
Opening size
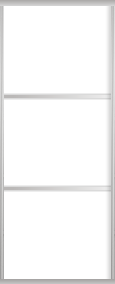
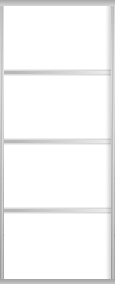
Door design


Door panel colours
Wood panels
Plain panels
Mirror panels
Standard colour glass
Special colour glass
Our Price: £ (Saving you £434)
Add to basketAdditional options
 |
End Panels* |
|
£85.00 each |
|
|
Strike Plates/Wall Liners* |
|
£25.00 each |
|
|
Floor/Ceiling Liners* |
|
£25.00 each |
|
|
*Choose a panel/liner colour! |
|
|
|
|
Soft Close |
|
£29.00 each |
|
|
Pivot Doors |
|
10% |
|
|
Triple Track |
|
10% |
| Top Hung Doors |
|
50% | |
|
|
Sliding Door Locks |
|
£49.00 each |
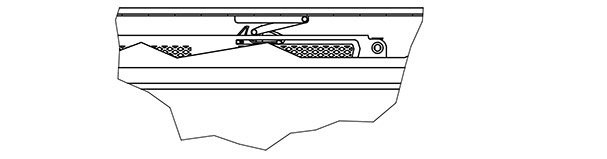
Frame profile
- Technical Specifications
- How to Measure
- How to Install
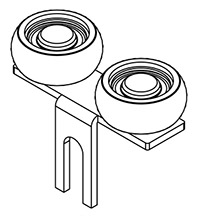
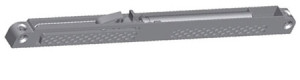
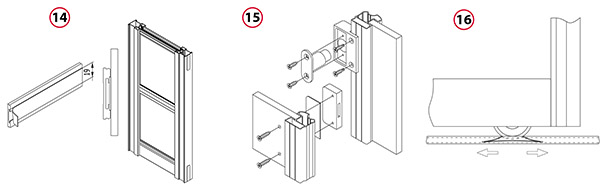
1. Bottom Roller for Aluminium System
 Body made from high-impact structural plastic. The moving part is adjustable within the 0-15 mm range by means of an adjusting bolt and is provided with a spring anti-jump feature. The roller has a wheel of a high-strength plastic with an embedded sealed, lubricated steel ball bearing. The set comes with the adjusting bolt and washer. Resistance: up to 60 kg/2rollers, up to 50,000 open/close cycles.
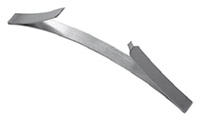
2. Symmetrical Top Guide with Bearing for Quebec Victoria Calgary Yukon Edmonton Hudson aluminum profiles.
 The guide is of durable steel construction. Two permanently riveted wheels of high-strength plastic and vibration damping rubber ensure extremely quiet operation.
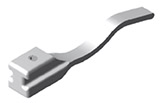
3. Bottom Positioner. (Purchased separately) A component that holds in position alum-inium system doors up to 12 kg
 A component that holds in position alum-inium system doors of 12 kg to 25 kg.
A component that holds in position alum-inium system doors of 25 kg to 50 kg.
(note: not included as standard but can be purchased)
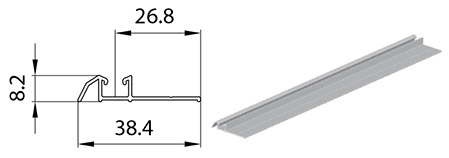
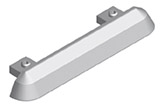
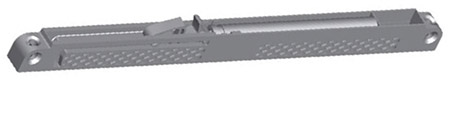
4. Aluminium Double Bottom Track. Length: 5 m
 Track made from aluminium alloy, anodized or finished in simulated wood paint.
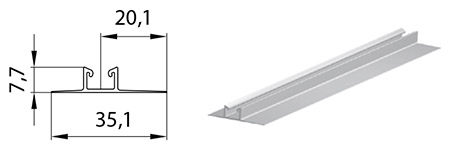
5. Double Bottom Track Fascia. (Purchased separately)
 Used as an insert to cover screw heads for double floor track.
(note: not included as standard but can be purchased)
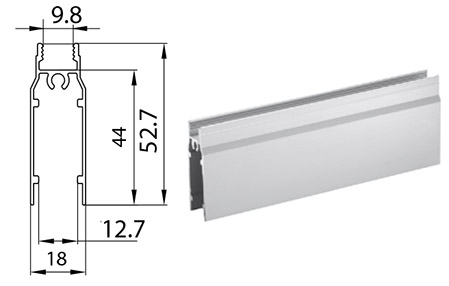
6. Aluminium Double Top Track.
 Made from aluminium alloy, anodized or finished in simulated wood paint.
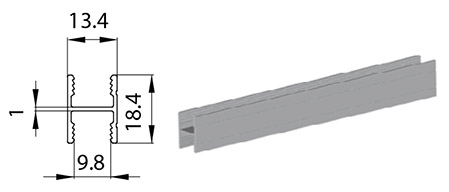
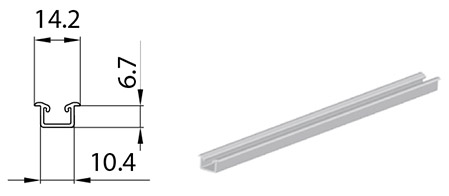
7. Narrow Aluminium Rail, 10 mm.
 A rail for 10 mm board , 8 or 6 mm glazing or 4 mm mirror panels. Made from aluminium alloy, anodized or finished in simulated wood paint.
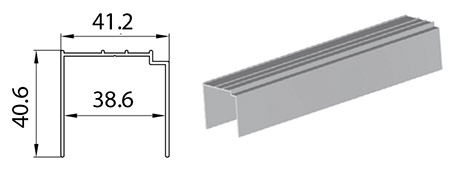
8. Wide Aluminium Rail, 10 mm.
 A general-purpose rail for top roller aluminium system.
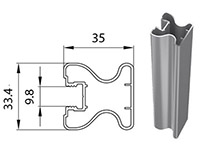
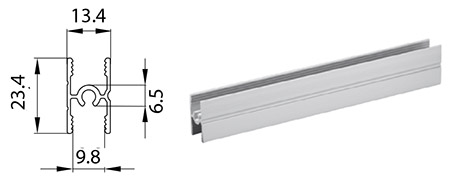
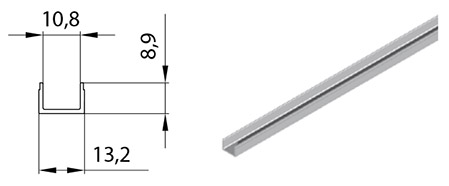
 11. Quebec Aluminium Stile, 10 mm.
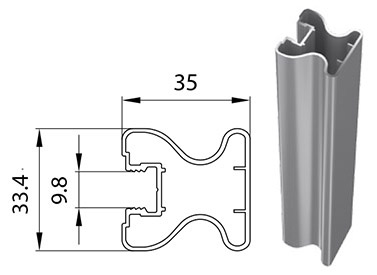
A profile for 10 mm board, 8 or 6 mm glazing or 4 mm mirror panels. Made from anodized aluminium alloy.
17. Aluminium Single Bottom Track. (Purchased separately, or supplied as part of a triple track)
 A track made from anodized aluminium alloy. The width of the single track enables it to be easily connected with other tracks (butt joints), providing correct distances between door leaves.
(note: only supplied if a triple track is specified)
18. Aluminium Single Top Track. (Purchased separately, or supplied as part of a triple track setup)
 Aluminium Single Top Track. Length: 5 m. A track made from anodized aluminium alloy or finished in simulated wood film. The track features a “shadow line” which masks ceiling irregularities. Profile length: 5000 mm.
(note: only supplied if a triple track is specified)
19. Aluminium Connector Rail, 10 mm.
 A profile for 10 mm board, 8 or 6 mm glazing or 4 mm mir-ror panels. Made from anodized aluminium alloy.
20. Aluminium Connector Rail, 10 mm.
 A profile for 10 mm board, 8 or 6 mm glazing or 4 mm mir-ror panels. Made from anodized aluminium alloy. Custom-designed shape for easy bending of the profile.
21. Aluminium Connector Rail, 4 mm.
 A profile for 4 mm glass or mirror panels or for board provided with an appropriate groove.
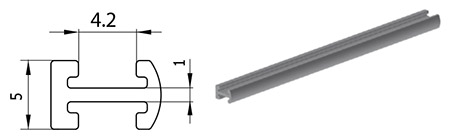
22. Decorative Strip, 18 mm
 An 18×2 mm universal decorative profile fixed to door panels as a divider when all panels are the same colour.
23. Aluminium Decorative Strip.
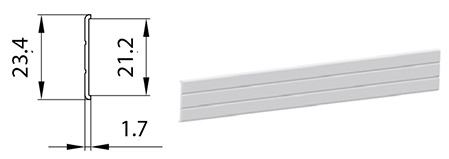 An 25×2 mm universal decorative profile fixed to door panels as a divider when all panels are the same colour.
24. Transparent Plug for Aluminium Profiles
 A plug covering installation holes.
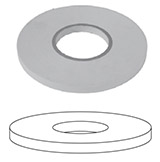
25. Gasket
 Aluminium System Gasket, 10/4 mm.
An elastic component for secure connection of mirror with a profile, fully concealed in the profile.
Versions: x:
K – Fig. 1 (milk).
V – Fig. 2.
C – Fig. 2 (transparent).
Packaging: 100 m/roll.
Weight: K – ~6.60 kg/roll,
V – ~4.90 kg/roll,
C – ~5.18 kg/roll.
Availability: continuous.
Aluminium System Gasket, 10/8 mm.
Packaging: 100 m/roll
Weight: ~3.35 kg/roll
Availability: continuous.
Aluminium System Gasket, 10/6 mm.
Packaging: 100 m/roll.
Weight: ~9.87 kg/roll.
Availability: continuous.
26. Self-adhesive Buffer Strip, 4.8×5 or 4.8 x 4 (Purchased separately)
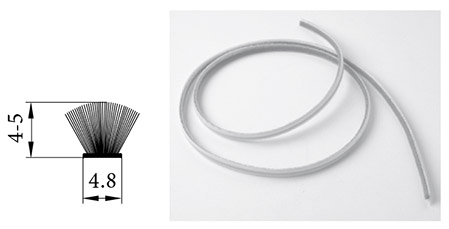 A strip designed to dampen door impact against the wall and eliminate minor wall irregularities.
Hair length: 5 mm or 4 mm.
(note: not included as standard but can be purchased)
27. Self-adhesive Dust-stop Brush, 6.7 x 12 (Purchased separately)
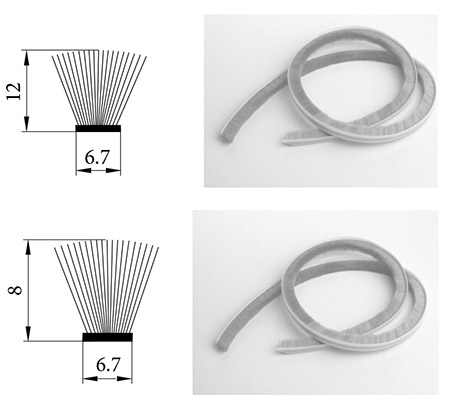 A brush designed to seal the space between door leaves and to stop dust. Hair length: 12 mm.
(note: not included as standard but can be purchased)
Self-adhesive Dust-stop Brush, 6.7 x 8.
A brush designed to seal the space between door leaves and to stop dust. Hair length: 8 mm.
(note: not included as standard but can be purchased)
28. Sliding Door Lock (Purchased separately)
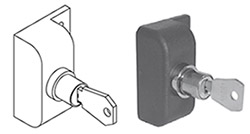 A universal lock for steel and aluminium door systems.
(note: not included as standard but can be purchased)
29. 4.8 x 25 Allen-head Self-tapping Screw
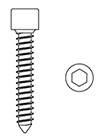 A basic fastener for the aluminium system.
30. Aluminium Recessed Single Bottom Track (Purchased separately)
 Length: 5 m. A track made from anodized aluminium alloy.
(note: not included as standard but can be purchased)
31. Aluminium Wide Recessed Single Track. Length: 5 m (Purchased separately)
 A track made from anodized aluminium alloy.
(note: not included as standard but can be purchased)
32. Mounting Profile for Recessed Single Bottom Profile, for use with Aluminium Recessed Single Bottom Track (no: 30 above) (Purchased separately)
 Length: 5 m. Colours: raw aluminium.
(note: not included as standard but can be purchased)
33. Self-adhesive Cap.
![]() Self-adhesive Cap.
Self-adhesive Cap.
Packaging: 48 pcs/pack.
Weight: ~0.02 kg/pack.
Availability: continuous.
Self-adhesive Cap. INDECO.
Packaging: 48 pcs/pack.
Weight: ~0.02 kg/pack.
Availability: continuous.
34. Self-adhesive Safety Backing (standard on the back of all glass and mirror).
 Self-adhesive Safety Backing, 100 mm x 250 m.
Transparent film. Packaging: 100 m2/roll, 10 cm wide.
Weight: ~2.50 kg/roll. Availability: continuous.
Self-adhesive Safety Backing, 200 mm x 250 m.
Black film. Packaging: 50 m2/roll, 20 cm wide.
Weight: ~5.00 kg/roll. Availability: continuous.
Self-adhesive Safety Backing, 300 mm x 250 m.
Transparent film. Packaging: 75 m2/roll, 30 cm wide.
Weight: ~7.50 kg/roll. Availability: continuous.
Self-adhesive Safety Backing, 400 mm x 250 m.
Transparent film. Packaging: 100 m2/roll, 40 cm wide.
Weight: ~10.50 kg/roll. Availability: continuous.
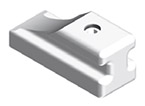
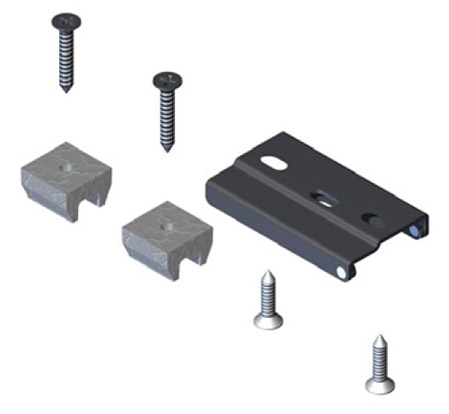
35. Aluminium Top Track Stopper (Purchased separately)
 Packaging: 1pce/pack.
Weight: ~0.04 kg/pack.
Availability: continuous.
(note: not included as standard but can be purchased)
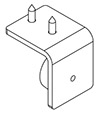
36. End Cap for Aluminium Single Top Track (Purchased separately)
 Packaging: 1 pce/pack.
Weight: ~0.004 kg/pack.
Availability: continuous.
(note: not included as standard but can be purchased)
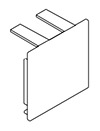
37. End Cap for Aluminium Double Top Track (Purchased separately)
 Packaging: 1 pce/pack.
Weight: ~0.01 kg/pack.
Availability: continuous.
(note: not included as standard but can be purchased)
38. Aluminium Bottom Track Stopper (Purchased separately)
 Packaging: 1 pce/pack.
Weight: ~0.001 kg/pack.
Availability: continuous.
Comes complete with 1.5 mm Allen key.
(note: not included as standard but can be purchased)
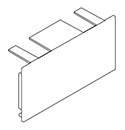
39. End Cap for Aluminium Double Bottom Track (Purchased separately)
 Packaging: 20 pcs/pack.
Weight: ~0.08 kg/pack.
Availability: continuous.
Comes complete with 1.5 mm Allen key.
(note: not included as standard but can be purchased)
40. End Cap for Aluminium Double Bottom Track (Purchased separately)
 x: L – left, R – right.
Packaging: 100 pcs/pack.
Weight: ~0.06 kg/pack.
Availability: continuous.
Comes complete with a 1.5 mm Allen key.
(note: not included as standard but can be purchased)
41. Double-sided Self-adhesive Tape, 0.8 mm
 All-purpose assembly tape.
Packaging: 25 m/pack.
Weight: ~0.17 kg/pack.
Availability: continuous.
(note: not included as standard but can be purchased)
42. Positioner for Aluminium Bottom Track (Purchased separately)
 Comes complete with a 1.5 mm Allen key.
Packaging: 10 pcs/pack.
Weight: ~0.003 kg/pack.
Availability: continuous.
(note: not included as standard but can be purchased)
43. Buffer Strip Clip (Purchased separately)
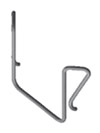 A clip preventing the buffer strip from coming unstuck.
Color: silver.
Packaging: 100 pcs/pack.
Weight: ~0.08 kg/pack.
Availability: continuous.
(note: not included as standard but can be purchased)
44. Buffer Strip Clip (Purchased separately)
 A clip preventing the buffer strip from coming unstuck.
Color: silver.
Packaging: 200 pcs/pack.
Weight: ~0.16 kg/pack.
Availability: continuous.
(note: not included as standard but can be purchased)
45. Aluminium System Soft Closer Accessories (Purchased separately)
 The accessories include:
– Trigger
– Fixing screws
– Adapters
Application: A100, A200, Ontario. Availability: continuous.
(note: not included as standard but can be purchased)
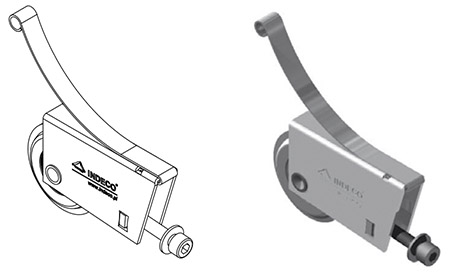
 46. Universal Soft Closer. (Purchased separately)
It ensures that the door leaf closes softly to its end position. The soft closer features an air damper, which guarantees durability and performance stability throughout its useful life.
The design of the soft closer body allows it to be used as a left-hand or right-hand closer. The installation of the soft closer on the steel system-based door leaf is possible with the use of the steel system door closer accessories 099245. The soft closer is available in two versions:
099233 – soft closer for doors of up to 25kg in weight.
099234 – soft closer for doors of 25 to 50kg in weight. Application: S100, A100, A200.
Availability: continuous.
(note: not included as standard but can be purchased)
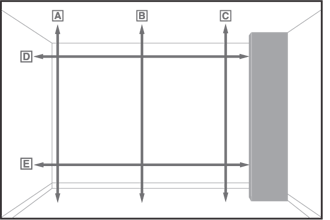
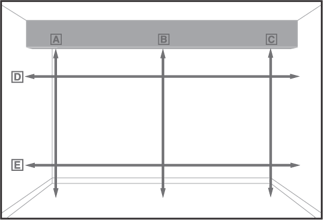
Important: Please remember, we always need the MINIMUM height dimension of A, B or C. Measure carefully, so we don’t make your doors too big. Use the Maximum of width D or E (this is less critical than the height). If in doubt call or email us with your questions.
Option 1: Fitting Floor to Ceiling and Wall to Wall:

This is the easiest to measure and install. If you have skirting’s, you will need to remove a portion where the doors touch the wall, or install wall liners as in ‘Option 2’.
Option 2: Using Floor and Wall Liners
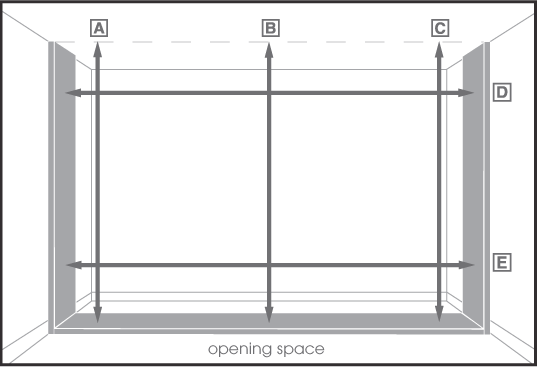
We recommend this if you walls are not vertical, and floor is not flat (or if you are installing on top of carpet). We can supply wall and floor liners in 18mm MFC in 3 core colours (white silver or oak). Pack out the liners to create vertical and horizontal surfaces. Calculate your DOOR & TRACK width and height measurements from inside the liners.
Option 3: Wall to End Panels

We have 18mm MFC end panels in 3 core colours (white, silver, oak), or alternatively, use MDF and decorate to exactly match your wall colour. End panels can be used in conjunction with ‘Wall and Floor Liners’ as shown in Option 2.
Option 4: Using Infill’s
For Openings Wider than 5000mm (Made to Measure Doors).
Only do this if your opening is wider than our widest track length of 5000mm. Infill’s can be placed on the left and right to centre your wardrobe. Again, we recommend MDF and decorate to match you walls, or use our range of end panels. Infill’s can be used in conjunction with ‘Wall and Floor Liners’ as shown in Option 2.
Option 5: Reducing Ceiling Height
For ceilings higher than 2500mm (Made to Measure Doors).
Again we recommend a timber and/or MDF construction, decorated to match your walls, or use our range of MFC end panels or floor liners. Ceiling reduction can also be used in conjunction with ‘Wall and Floor Liners’ as shown in option 2.
Option 6: Angled Ceiling (Please contact us for angled doors)
For angled ceilings:
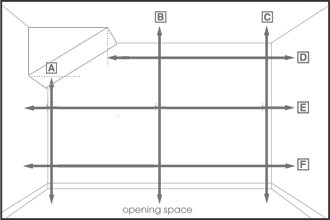
Due to the nature of angled wardrobe doors, we need you to take additional measurements in order for us to manufacture your doors to fit the opening.
Here, measurement A is the height from the floor to the base of the angled section (referred to within the design tool as ‘Short Height’) and measurement D is the width of the opening at the ceiling (between the tall wall, and where the angled section meets the ceiling – this is referred to in the design tool as ‘Ceiling Width’). The smallest of measurements B and C, and the largest of measurements E and F are the ‘height’ and ‘width’ of your opening respectively.
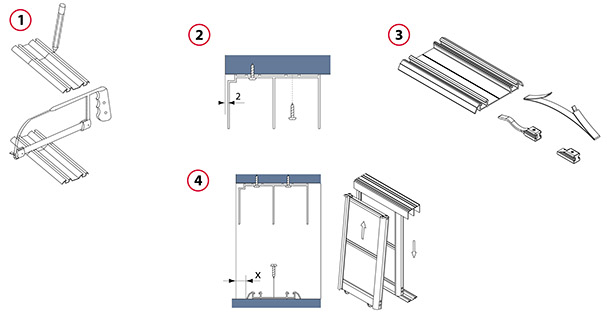
1. Cut the tracks
Carefully measure the width of the opening at top and bottom, and reduce the lengths measured by about 2-3 mm. Measure off the required track length, marking the future cut line on the tracks. Use a fine-toothed metal cutting saw to cut off the redundant part of the tracks.
Advice: The tracks to be installed should be about 50 mm longer than the opening width. This spare length will make it possible to avoid measurement errors and it is easy to trim. In order to facilitate top track cutting, insert 38 mm thick wood blocks or a reversed piece of track into the track. This will prevent track deflection during the cutting process.
2. Install the top track
Fix the top track with screws, offsetting its flat surface by 2 mm from the door face (inwards). Install the top track with the shade line facing forward in order to mask ceiling irregularities. If a multiple-track system is installed, fix the other tracks so that they fit tightly against each other along the entire length.
Advice: Avoid applying excessive force when tightening screws to prevent track deformation. Use flat-head screws for best results. The surface to which the track is fixed must not be curved.
3. Fix stoppers and positioners in the bottom track
If the track is to be fitted with bottom positioners and stoppers, slip them into the respective tracks before fixing. Fully in-sert the door leaf in the top track, taking care not to damage the bottom rollers, then align the bottom end of the door leaf with the bottom track and slowly lower the leaf, letting the rollers snap into the tracks.
For door weights under 12 kg use positioner 099259A.
For door weights between 12 kg and 25 kg use positioner 099259.
For door weights between 25 kg and 50 kg use positioner 099259B.
4. Install the door
Lay the bottom track on the floor, offsetting it from the door face (inwards) by about:
x = 11mm – Calgary Victoria Edmonton Hudson Quebec, profile
x = 18mm – Niagara Windsor profile
If the track is to be fitted with bottom positioners, slip them into the respective tracks before fixing. Fully insert the door leaf in the top track, taking care not to damage the bottom rollers, then align the bottom end of the door leaf with the bottom track and slowly lower the leaf, letting the rollers snap into the tracks.
Advice: Before you install the doors, put a cardboard sheet on the bottom track to prevent damage to track surface. When the doors are alrea-dy in position, remove the protective cardboard.
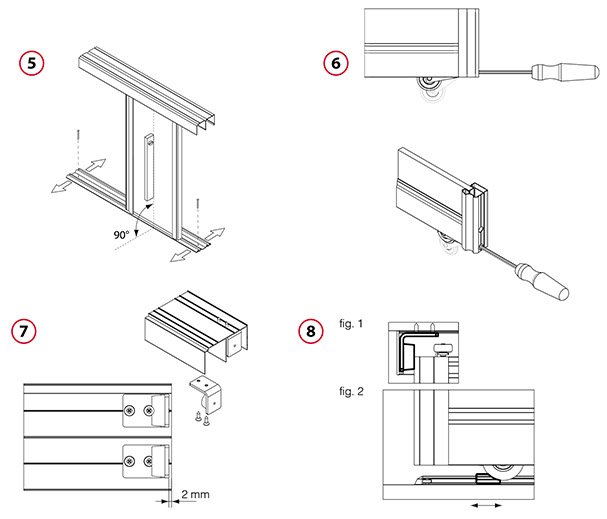
5. Install the bottom track
Use a level to make sure the door is exactly plumb; move the bottom track as necessary. Check if the door travels smoothly along the entire width of the opening. Having precisely adjusted the door position, install the other door leaves in their respective tracks.
Advice: Before you fix the bottom track, make sure that it is positioned exactly parallel to the top track. With soft floor covering, be-fore you fix the bottom track, cut out a strip of about 55 mm in width and replace it with a 55 mm timber batten. Alternatively, put a 100 mm floor batten between the floor covering and the bottom track. Avoid applying excessive force when tightening screws to prevent track deformation. Use flat-head screws for best results.
6. Adjust door position
Adjust door position by means of the adjusting bolts in the bottom rollers so that the doors fit tightly against the wall along the entire length. Door-to-floor clearance is adjustable between 11 and 20 mm (3 to 12 mm from the bottom track).
7. Fix the top track stopper
Before fixing the stopper, drill through-holes with a 4 mm drill bit. Then fix the stopper to the ceiling (upper wall) using screws suitable for the ceiling/wall material. If you install an end cap in the top track, insert the cap tabs between the track and the ceiling before finally fastening the stopper screws.
8. Adjust the bottom stopper and top stopper
Having installed the top track stopper, adjust the position of the stopper 099275 set in the bottom track. To do this, slide the door to the top stopper as shown in Fig. 1 and push the bottom stopper to the wheel edge (Fig. 2). Fasten the bottom stopper screw with a 1.5 mm Allen key to prevent its dislocation when the door is used.
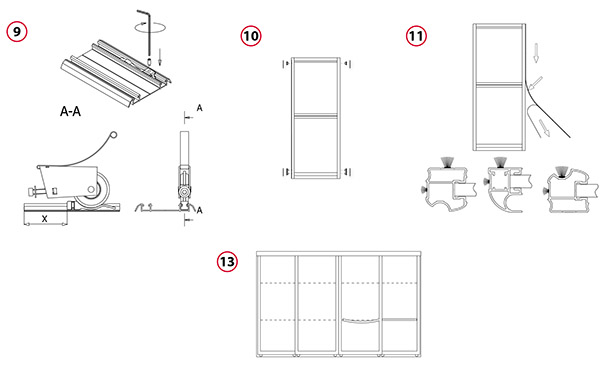
9. Fix the positioner/stopper
Insert the positioner/stopper into the bottom track before is installation. After the bottom track is fixed to the floor, tighten the positioner with an M3x8 ISO 4026 set screw (the key and the screw are delivered in the kit). Remount the door and in-stall it in the right position. The distance between the positioner and the end of the track “X” depends on the stile (vertical profile) used. This way you can easily verify if the positioner is fixed properly and in which direction it should be moved if needed.
The positioner can be used in all bottom tracks:
– single 153000xx,
– double 153250xx,
– wide recessed single track 153260xx,
– narrow recessed single track 153255xx.
10. Fix the caps
Having installed and adjusted the door leaves, cover all installation holes by inserting the plugs 16000080 or by sticking the caps 16000090 or 16000085.
11. Fix the dust-stop brush strips and buffer strips
To ensure good adhesion of the strips to the profiles, gently clean the profiles with alcohol or white spirit. Fix the strips, working your way from top to bottom. Cut off excess strip.
Advice: for Niagara Windsor profiles, use a shorter 8mm strip 81100019. For other profiles, use a longer 12mm strip 81100020.
12. Fix the buffer strip clip
To fix the clip 099249 or 099249A, the door must first be installed and adjusted. After that operation, fix the buffer strip and then mount the clip. For easier and correct installation, we recommend that the door should be taken off the tracks.
Advice: For details of the buffer strip clip installation see separate instructions, “Technical information– fixing the buffer strip clip” available on our website in the section designated for Authorised Partners.
13. Fix the decorative strips
Having adjusted the door leaf height, mark the levels where decorative strips are to be fixed to the door leaves. For each leaf, carefully measure the distance between the stiles. Then cut the decorative strips to the required lengths and fix do-uble-sided self-adhesive tape 16000005 (0.8 mm thick) to the strips. Remove the protective tape and, bending the strip slightly, put it between the stiles and press against the panel.
14. Fix the decorative profile designed for the Hudson profile
The bottom track fascia 156220xx can be used as a decorative profile. For this purpose, fix double-sided self-adhesive tape 16000005 to the profiled indent and then stick the profile to the door leaf.
15. Install the locks
Fix the lock cylinder to the body with 3.9 x 16 screws 87000012. Fix the body with the attached cylinder to the stile on the outer door leaf with 3.9 x 16 self-tapping screws 87000055. Putting the door leaf in closed position, mark the outline of the lock body on the inner door. Then fix the lock base at the marked location on the board panel with 3.9 x 22 self-tapping screws 87000060, using two previously drilled holes.
For a mirror, fix the lock base using double-sided self-adhesive tape 16000005.
16. Adjust the bottom positioners
Put the door in set positions. Mark the positions of the bottom roller wheels. Slide the door to the side, press the positioner tips in place, and move the door to the desired position.
Advice: For light (narrow) doors use a single bottom positioner for each leaf; for heavy (wide) doors use two positioners per leaf.
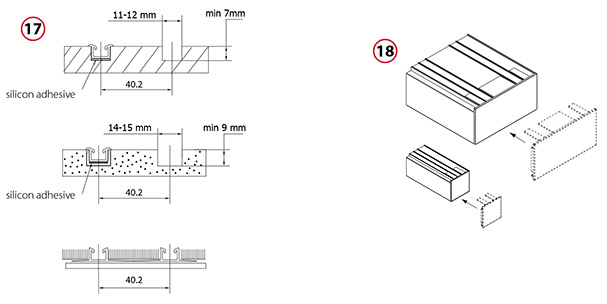
17. Fix the recessed bottom tracks
Recessed track
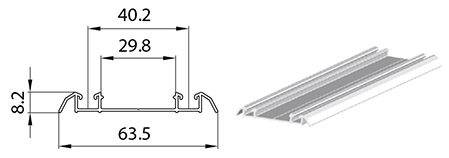
The recessed bottom track can be fixed in ceramic or parquet flooring or to furniture board. Leave or make a groove of 11- 12 mm in width and min. 7 mm in depth. Fix the track using silicon adhesive. Prior to fixing the track, apply an appropriate quantity of the adhesive along the bottom of the groove. Where two or more tracks are installed, provide for 40.2 mm spacing on centres (distance between track centre lines).
Track recessed into ceramic flooring:
A recessed bottom track can be mounted in ceramic flooring. Leave a groove of 14-15 mm in width and at least 9 mm in depth, in which to install the mounting profile 156250SU or embed it in mortar before it sets. Prior to door installation, fix the track 153255xx using silicone adhesive.
Wide recessed track:
The wide recessed track can be installed under carpeting. Fix the track using screws, double-sided self-adhesive tape or si-licon adhesive. Where two tracks are installed, correct spacing of tracks will be obtained by laying them next to each other so that the wider sides of their bases abut.
Advice: In an uneven floor, fix the tracks with silicon adhesive.
18. Fix the single or double top track end cap
Single and double top tracks can be fitted with end caps if the tracks are shorter than the width of the opening or they are installed outside the opening fitted with sliding doors. Before finally fastening the track fixing screws, insert the cap tabs between the track and the ceiling. Then fasten the track fixing screws.
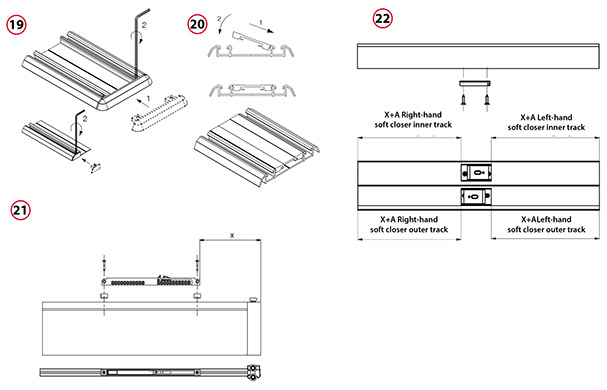
19. Fix the single or double bottom track end cap
Insert the cap into the single or double bottom track. Having done this, fasten the cap with a 1.5 mm Allen key.
20. Mount the fascia
Install the bottom track fascia 156220xx, resting the special indent in the fascia on the bottom track rib. Then press the fascia until it snaps into place.
21. Mount the universal soft closer.
Fasten the universal soft closer 09923X to the narrow rail with adapters and 3.5 x 23 screws (aluminium system soft closer accessories). Having fastened the soft closer, measure the distance between the door edge and the soft closer (“X”).
22. Mount the soft closer trigger
Mount the trigger at the distance “X” + “A” from the track edge, fixing it to the top track with 3.5 x 16 screws.
For the right-hand soft closer in the outer track, dimension “A” = 55mm.
For the right-hand soft closer in the inner track, dimension “A” = 80mm.
For the left-hand soft closer in the outer track, dimension “A” = 80mm.
For the left-hand soft closer in the inner track, dimension “A” = 55mm.
Before fixing the screws, drill lead holes in the top track with a 2mm drill bit.
1. Installation of the universal soft closer in aluminium systems
Fasten the universal soft closer 09923X to the narrow rail by means of adapters and 3.5 x 23 screws (aluminium system soft closer accessories). Having fastened the closer, release the activator on the door, so it sits inthe position shown, then measure the distance “X” from the closing edge of the door.
 2. Installation of the soft closer trigger
Screw the activator plate into the track so that the bar is the same distance from the wall (“X”). First screw the main plate to the track, and then a single screw through the piece that rotates down to hold it up in position. This last single screw and the grub screw allows you to adjust the height of the bar if required.
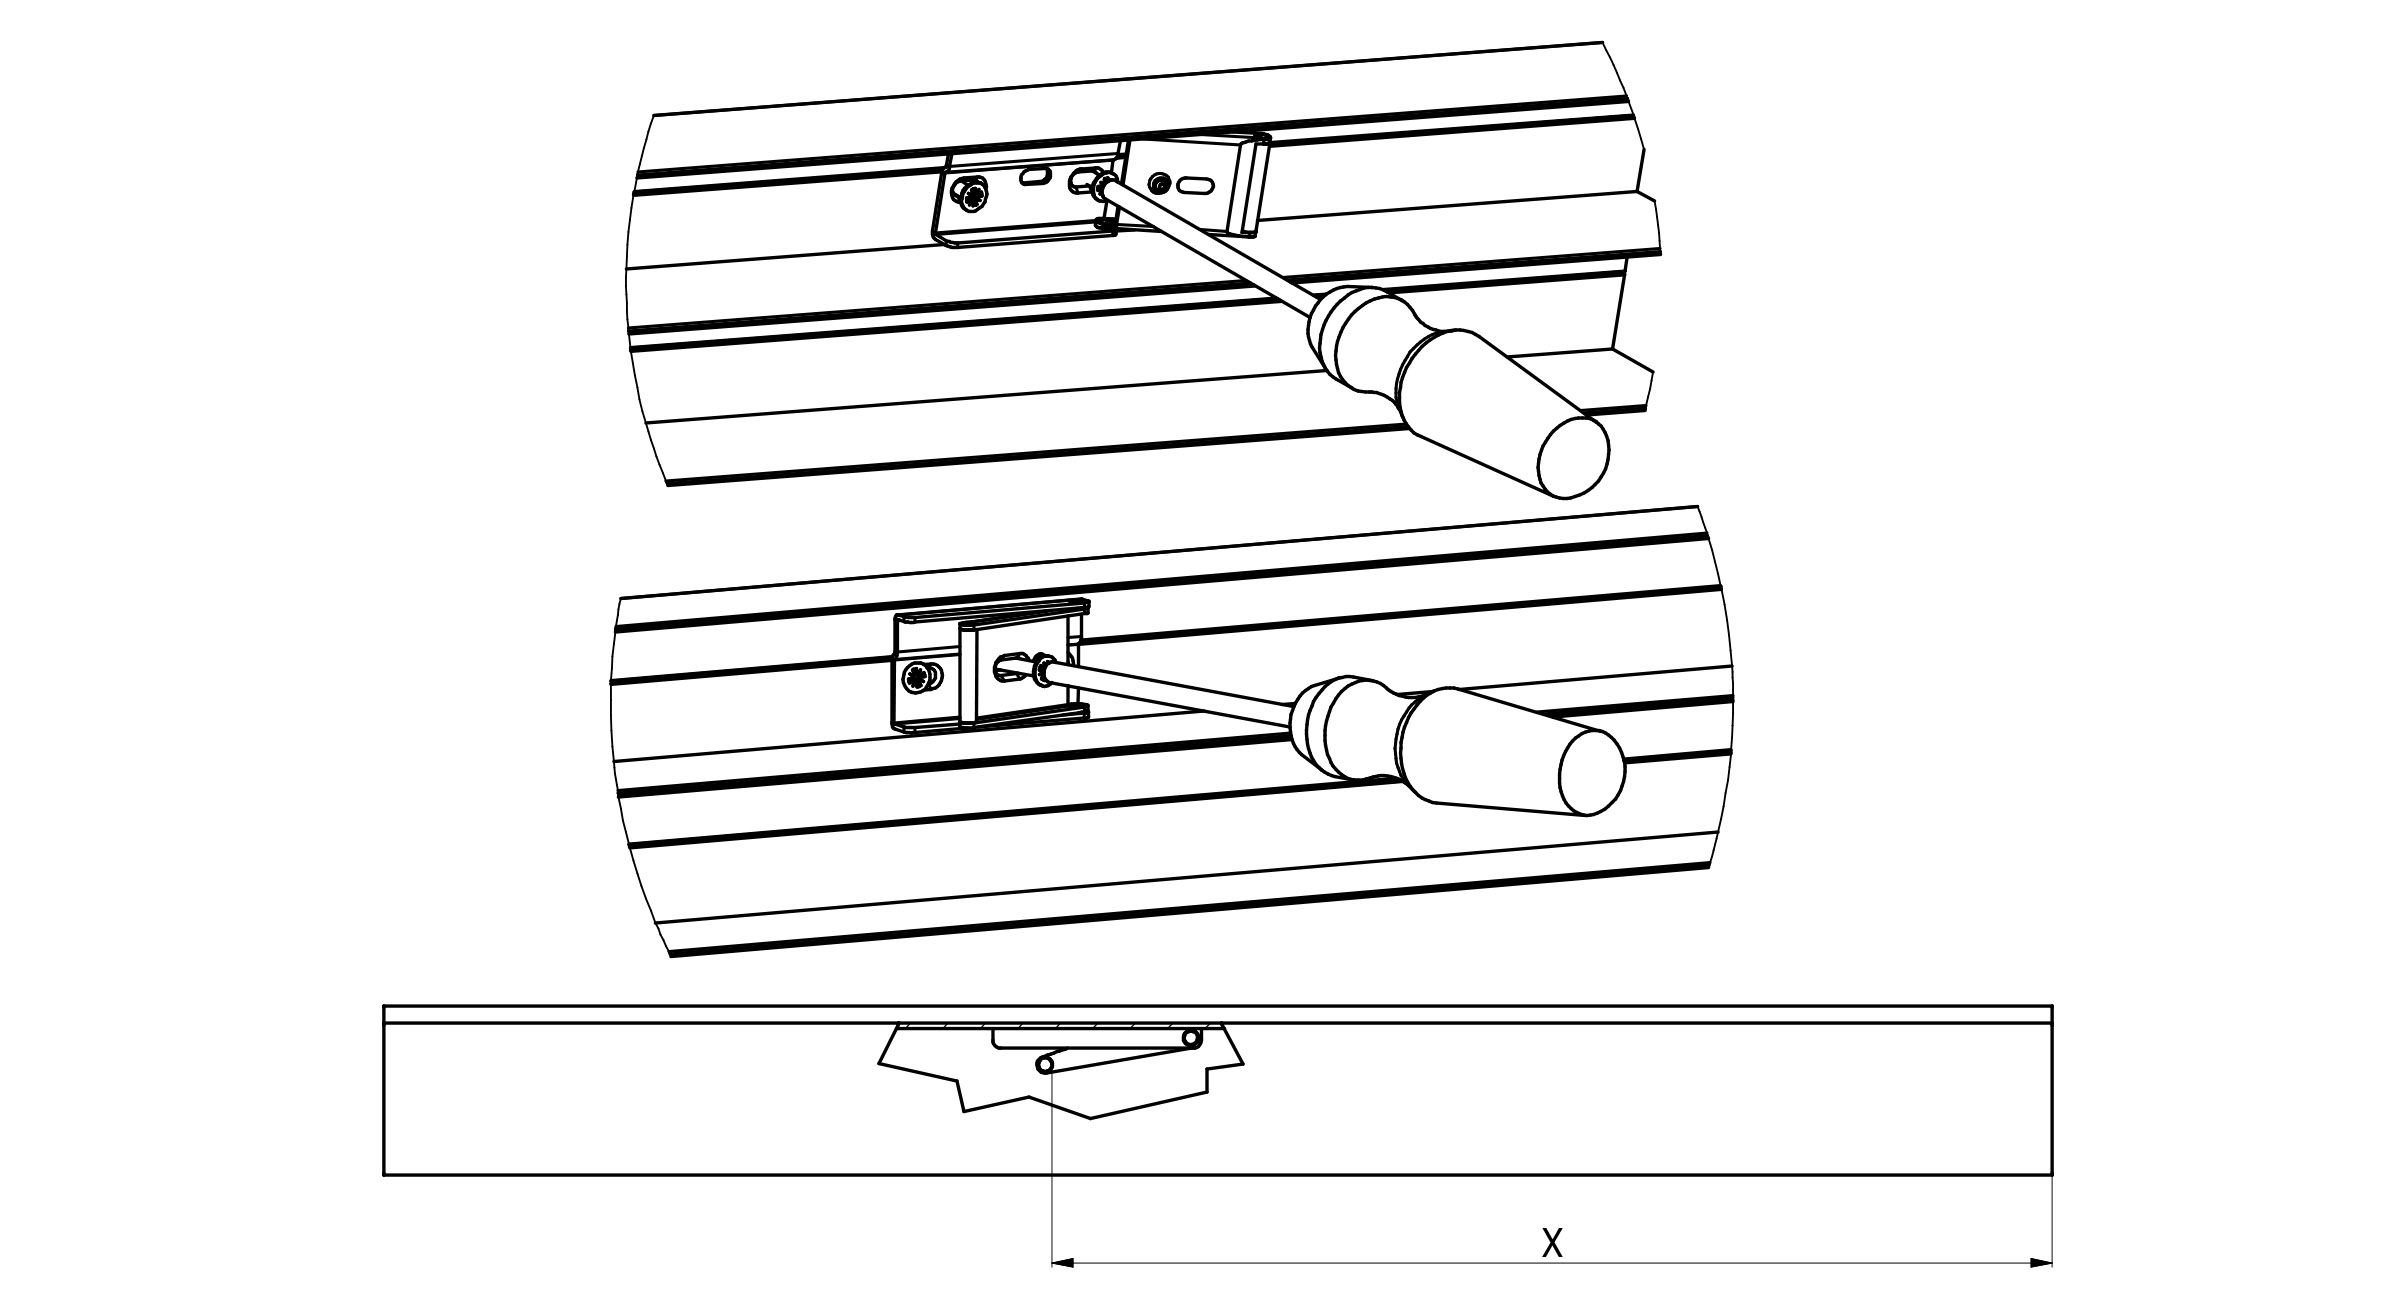
Install the door and adjust the height of the door, so the soft close unit meets the activator plate.